
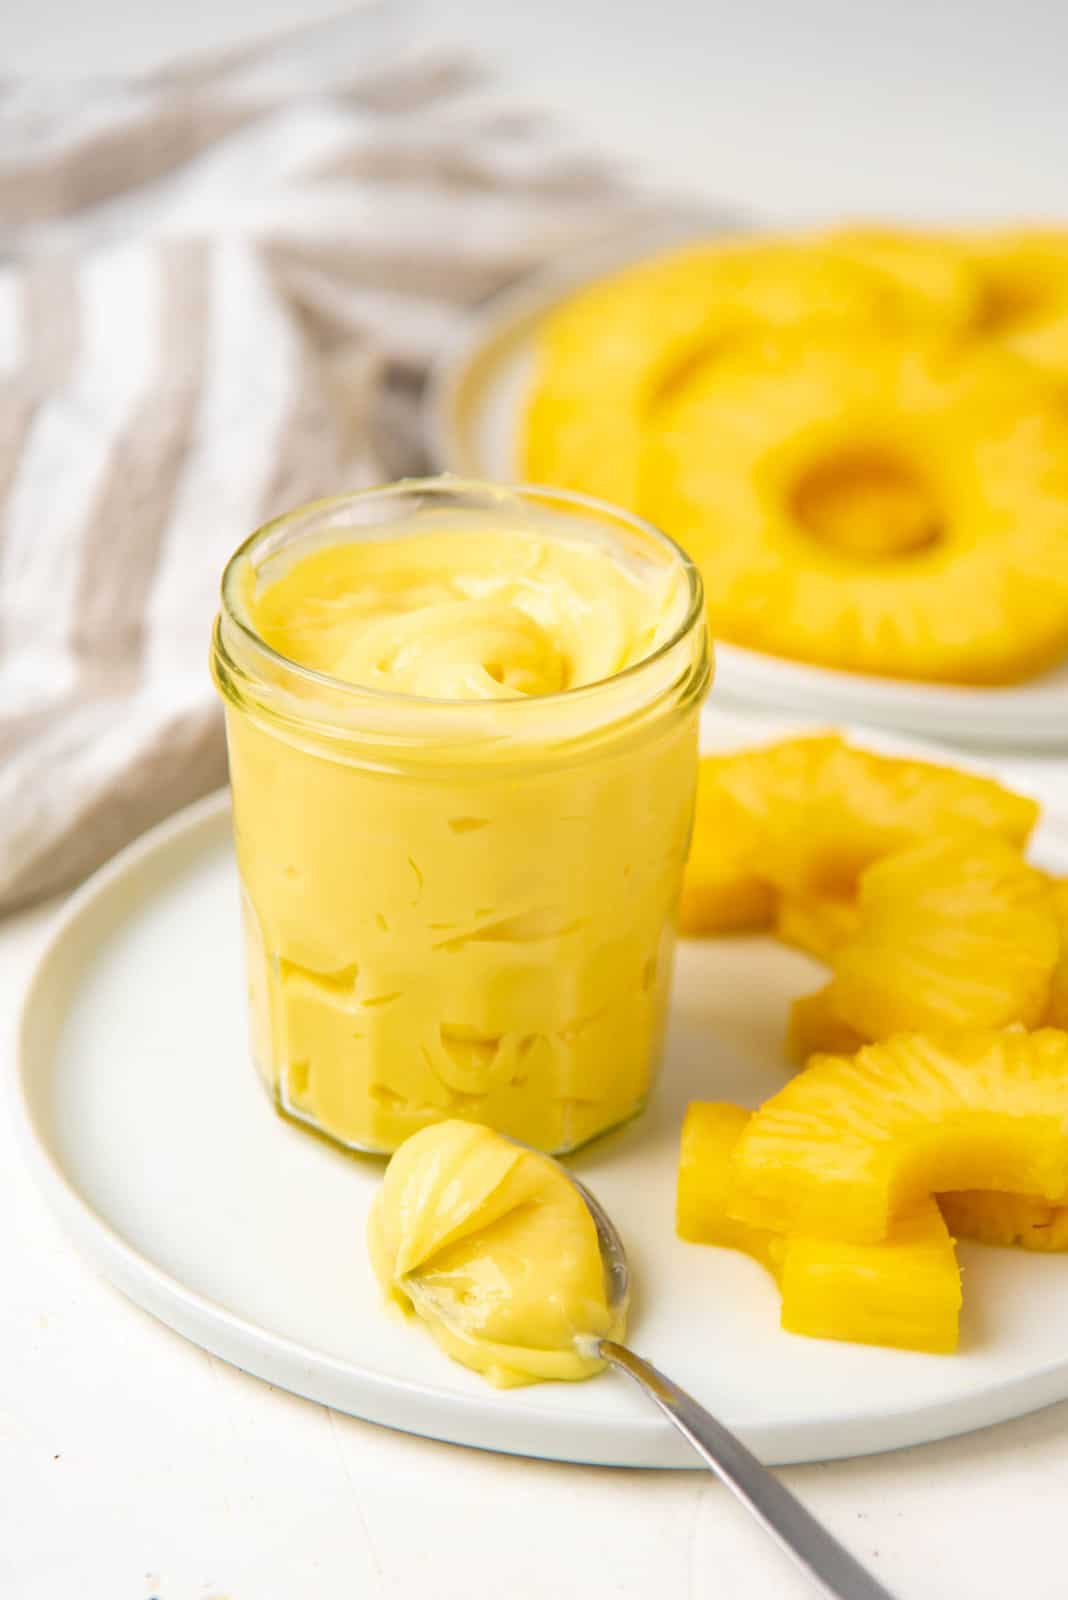
Pineapple Curd that is sweet, creamy, tangy, and looks and tastes like a spoonful of glorious summer! Very easy to make, a delicious alternative to lemon curd or passion fruit curd , and it pairs well with anything!
Make this easy and creamy pineapple curd to eat on its own, or as a filling for a variety of delicious desserts !

- Ingredients to make pineapple curd
- How to make pineapple curd
- Tips to perfect this recipe
- Uses for pineapple curd
- Storage
- Frequently asked questions
A sweet, perfectly ripe pineapple is one of the best things that I look forward to in Spring and Summer.
I love making pineapple syrup that I can then store for months to come, and I also love making creamy pineapple tart , pineapple popsicles , chia fresca with pineapple etc. as summer treats.
Having said that, I also have a love-hate relationship with fresh pineapple because of how it makes my tongue itch (thanks Bromelain!).
But that (usually) doesn’t stop me from gorging myself with fresh, juicy pineapple every time though.
Pineapple curd
I got the idea to make this pineapple curd when we got some pineapple recently, and it was some of the sweetest tasting pineapple I’ve had in a long time!
Wanting to do something different with the pineapples, I thought I’d try a pineapple curd, for a lovely fruity, tangy spread for breakfast and brunch.
I’ve already shared my recipes for lemon curd and passion fruit curd , so a tropical curd like this pineapple curd seemed like a great idea as well!
This pineapple curd is so versatile and incredibly delicious! And very easy to make. I’ve made it many times, and haven’t had it curdle even once.
Just follow the tips that I’ve provided to get perfect results every time!
This recipe has been thoroughly re-tested and adjusted in July 2024. The adjustments made were to,
- Increase the pineapple flavor in the final curd.
- Decrease the cornstarch amount, as a few of my readers had issues with properly cooking the pineapple juice.
- Still keep the final curd deliciously creamy.

Ingredients to make pineapple curd
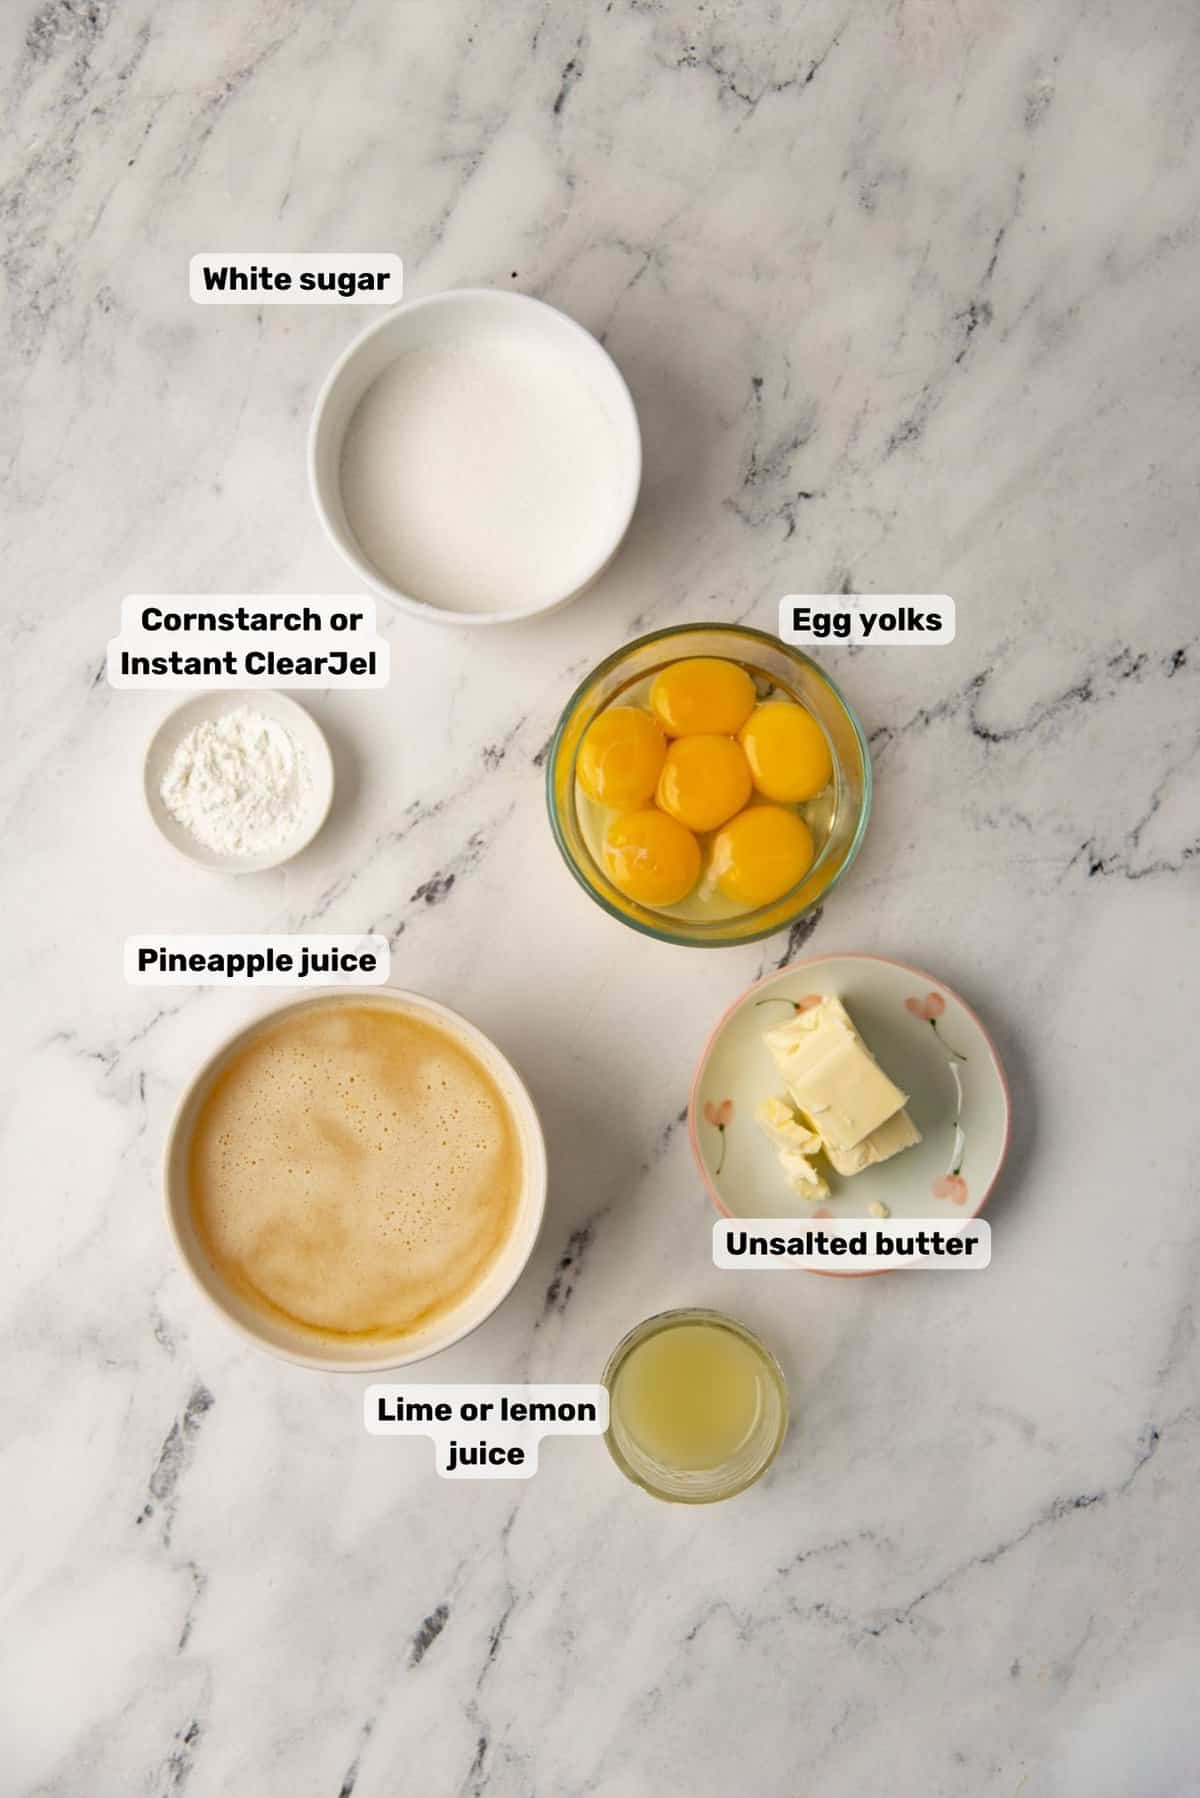
Pineapple juice
I like to use store-bought pineapple juice because it’s more convenient and the flavor is more consistent.
It’s easy to find 100% pineapple juice with no water or sugar added. Dole pineapple juice is a fantastic option. The juice is sweet and delicious and perfect for this curd recipe.
However, you can also use freshly juiced pineapple. I have done this too, and the results are delicious!
Use a juicer to extract the juice from the pineapple. I have a cold press / masticating juicer, which, from what I’ve read, preserves the nutrients of your fruits more. But you can use any juicer you own.
Another option is to blend the pineapple, and then pass it through a nut milk bag / cheesecloth to remove all the pulp.
This way you can squeeze out all the juice, and still use the pulp in smoothies if you like.

Sugar
The amount of sugar you add will vary depending on the sweetness of the pineapple juice you use.
The sugar in this recipe, is based on canned pineapple juice, so I know the sweetness is fairly consistent. However, if you use fresh pineapple, you may need to adjust the sugar content to your liking.
Lemon or lime juice
The sour lemon or lime juice enhances the flavor of pineapple juice.
Cornstarch or Instant ClearJel
Since pineapple has a more delicate flavor, I didn’t want to rely only on egg yolks to thicken the curd.
This is why I add a little cornstarch or instant clearjel to help with the thickening. It thickens the curd without adding additional flavor.
Cornstarch is absolutely fine to use, but if you have plans on freezing your pineapple curd, then I recommend using instant clearjel.
Egg yolks
A previous version of this recipe used both whole eggs and egg yolks. After re-testing this recipe, I removed the extra liquid added from the egg whites, and just use egg yolks now.
Egg yolks add a lovely richness to the pineapple curd while thickening it as well.
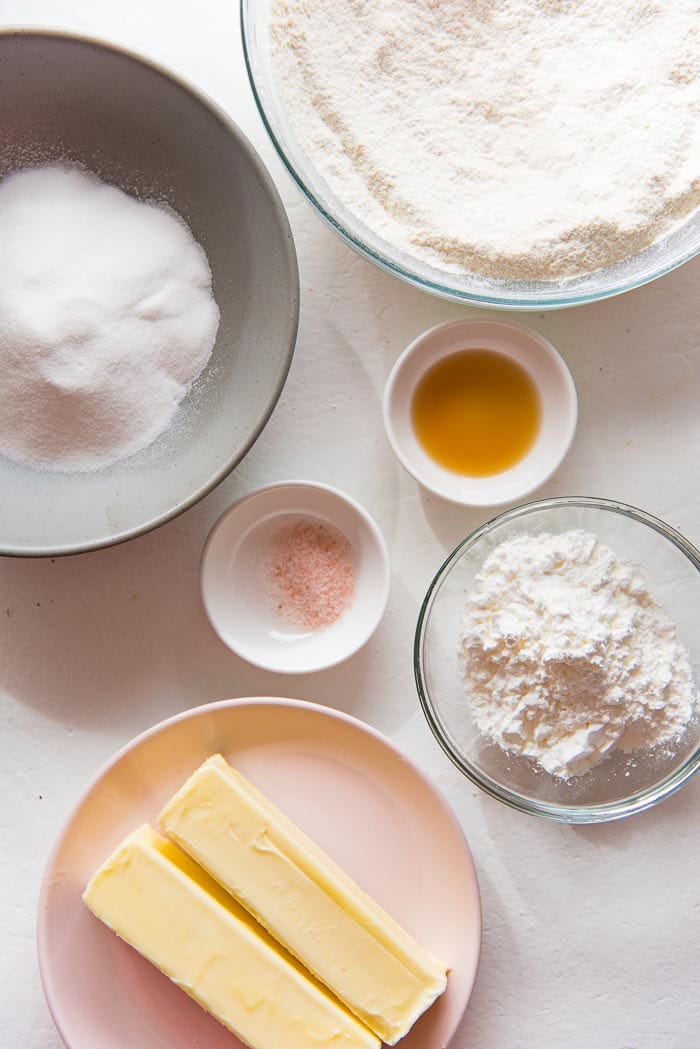
Butter
Butter has two functions in this recipe.
- It adds a creaminess to the final pineapple curd.
- It helps to make the pineapple curd deliciously spreadable after it’s chilled in the fridge, and contributes to the thickening as the curd chills.
How to make pineapple curd
All the ingredients should be measured and ready to go before you start cooking. You will also need,
- A non-reactive saucepan (since you’ll be cooking an acidic liquid)
- Whisks
- A stick blender or regular blender (to make the curd more creamy)
- A sieve / strainer
- Spatula
Making concentrated pineapple juice
The first step is to increase the pineapple flavor in the curd by concentrating the pineapple juice.
This is done by using double the amount of pineapple juice, but heating it boil it down to 50% volume. This way you have a slightly thicker juice, with a more prominent pineapple flavor! The juice will be slightly thicker and darker in color than the pineapple juice that was not cooked down (image 1) .
This is really important for two reasons.
1 ) Pineapple juice has a lighter flavor compared to lemon juice or passion fruit juice when making fruit curds. So the pineapple flavor tends to get lost in the eggs, butter, and cornstarch. This reduction step makes the pineapple flavor that much more potent.
2 ) This also results in a slightly thicker juice that further helps with the thickening of the curd, PLUS it’s sweeter and needs less sugar.
Once the pineapple juice is reduced by 50%, pour the juice into a jug to make sure you have the right amount of juice. Then set it aside. You can do this ahead of time if you like too.

Mix the pineapple curd base
Next, place the sugar and cornstarch in a dry bowl and whisk until there are no cornstarch lumps (image 2) .
This is especially important if you’re using instant clearjel because clearjell will dissolve better IF it’s mixed with dry ingredients such as sugar first. It helps to prevent clumping. Place this in the saucepan.
Then add the egg yolks and citrus juice (image 3) .

Now whisk this mixture very well until there are no lumps and the mixture is nice and smooth (image 4) .
Now add the reduced pineapple juice, while whisking, to mix everything well. Finally add the butter (image 5) .
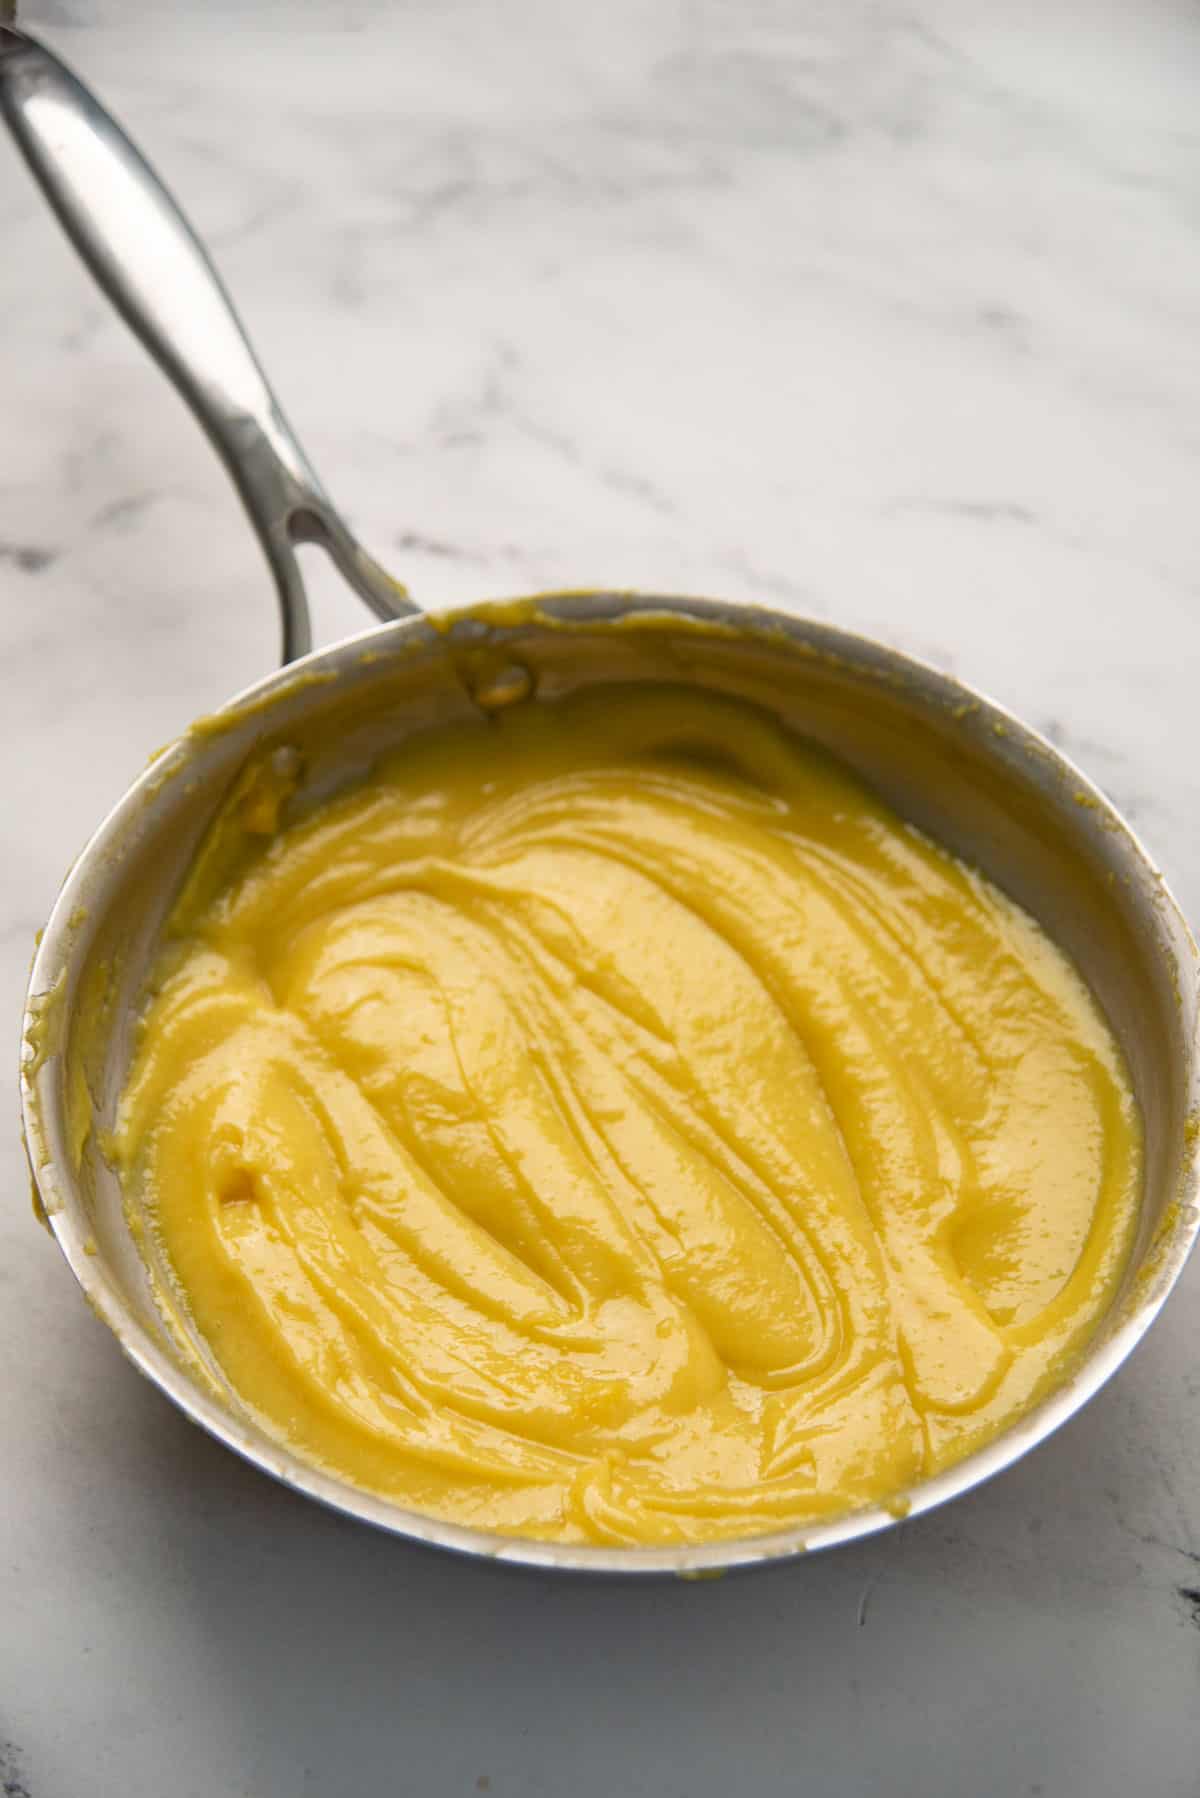
Cook the pineapple curd

Heat the mixture over medium heat while constantly whisking. The mixture will start to boil in about 5 minutes (depending on the pot you use).
When the mixture starts to boil, reduce the heat slightly and continue to cook the pineapple curd until it registers at about 180 – 190 F .
Make sure to whisk constantly to prevent the egg yolks from scrambling. This can take a further 5 – 6 minutes, depending on the pot you use (image 6) .
If you use a shallow pan, then the curd can cook much faster. And to prevent the eggs from scrambling, the heat must be reduced to low, and you have to whisk the mixture a little faster.
The pineapple curds will go from looking creamy to having a little sheen, or slightly translucent and shiny. This is OK!
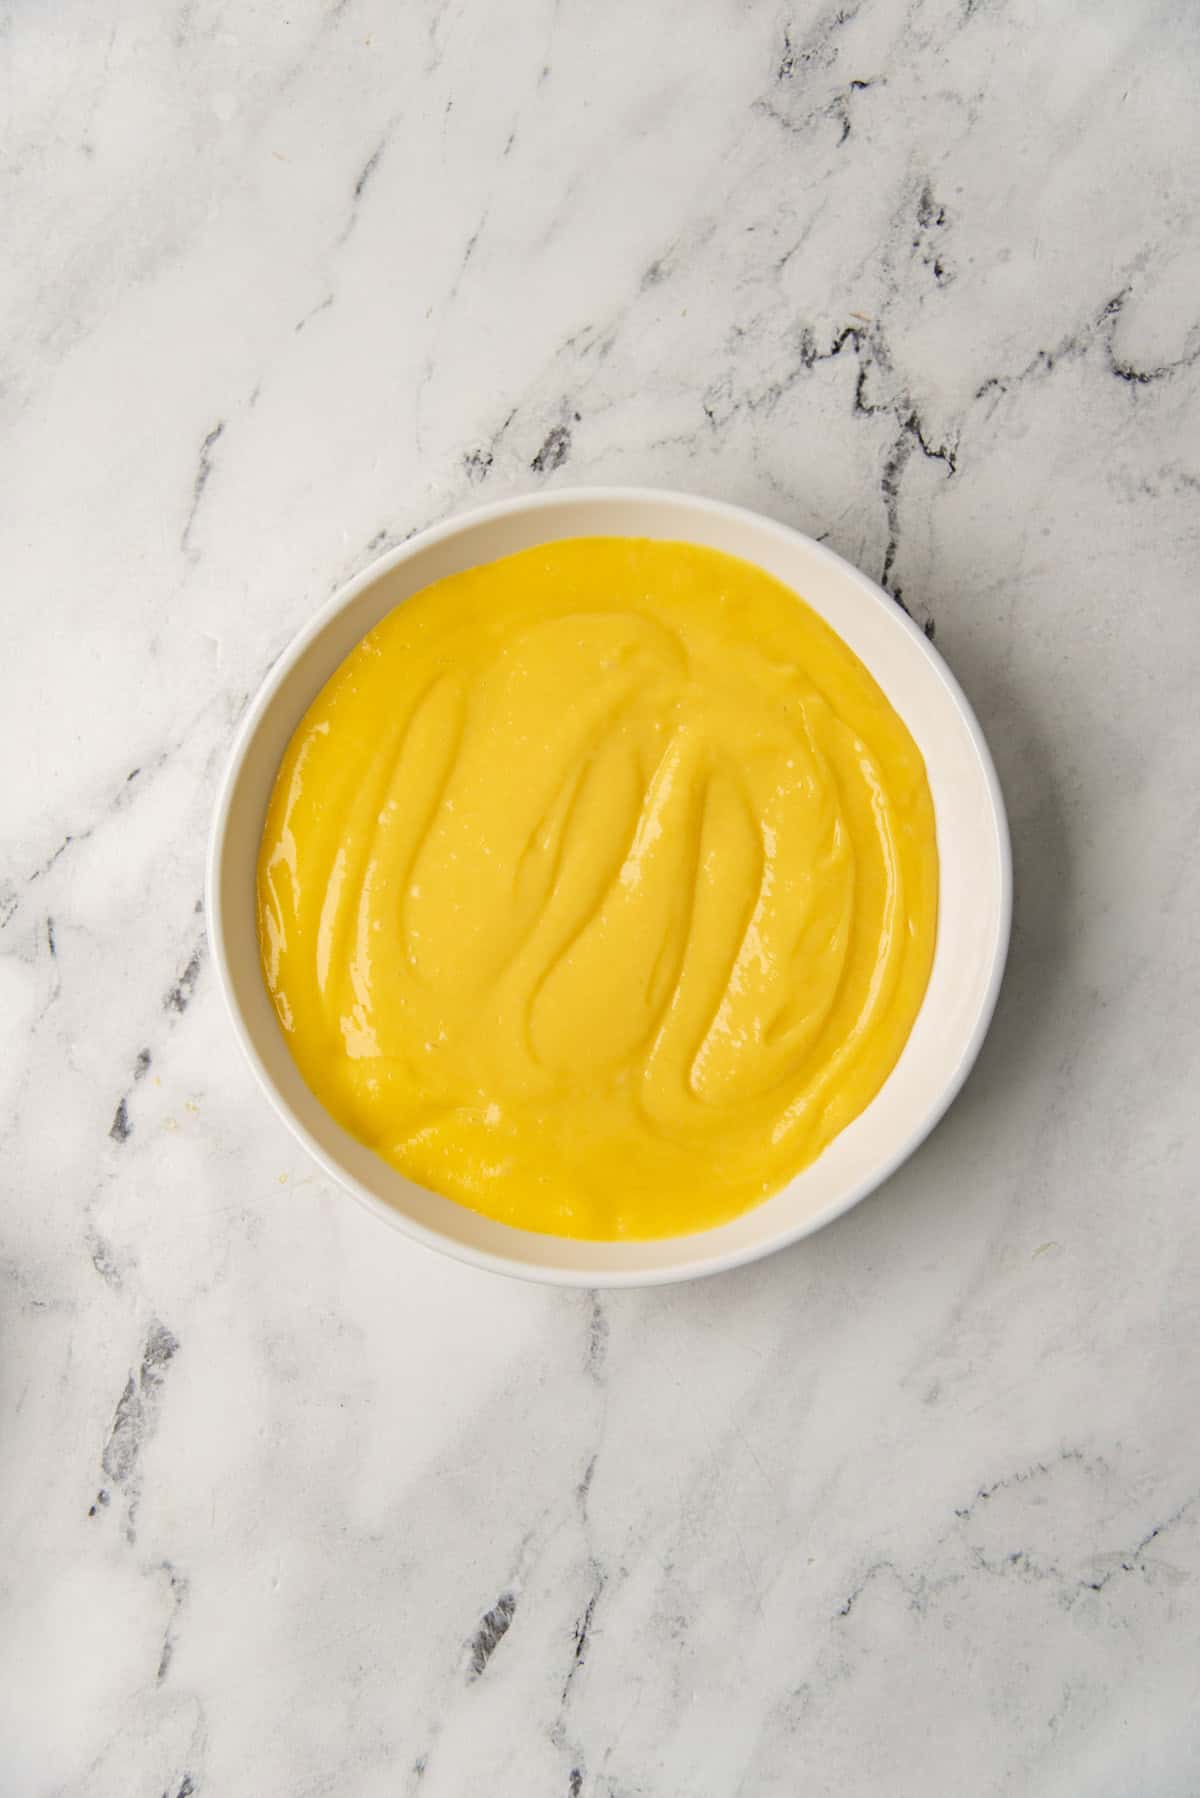
Strain the pineapple curd and chill
Next, use a stick blender to blend the curd for 1 minute. This will make the curd look creamy and glossy. This step is optional, but it does change the consistency of the pineapple curd! Pass the pineapple cur through a sieve into a bowl.
Transfer the pineapple curd into a container and let it cool down a little and then chill overnight in the fridge.
Once completely cooled, whisk the mixture to make it smooth again and store in an airtight container. This will keep in the fridge for up to about 5 days.
Tips to perfect this recipe
Delicious pineapple juice – The flavor of this curd is highly dependent on the flavor of your pineapple juice. If the juice is watery with little flavor, it’s not going to yield a good pineapple curd. Sourness can be adjusted with sugar, but flavor, not so much.
Reduce the juice – By heating the pineapple juice to reduce it by half, we’re concentrating the pineapple flavor! This means a more flavorful curd, and less sugar to add. Win-win. If you want to add even more pineapple flavor, you can cook down 3 cups of pineapple juice to make 1 cup (reduced by about 67%).
Pay attention – This is a very easy recipe. However, it requires your attention. Don’t walk away from the pot while making the curd. The curd could burn, or even curdle.
Whisk – Whisking the mixture will help evenly distribute the heat throughout the pineapple curd. This prevents the mixture from curdling, or catching at the bottom of the pot. Even-heating guarantees smoother, better results overall.
Stick blender – I know this might seem excessive. But to make this a thick pineapple curd with less cornstarch, it has to be cooked a little longer to make it jello-like. This results in the butter separating slightly, making the curd translucent. But a stick blender will make it creamy again by tempering the butter.
Use a sieve – After cooking the curd, pass it through a sieve. The sieve will make the curd smoother, especially if the curd has a few small curdled pieces of egg.
Use a non-reactive saucepan / pot – I’ve learned the hard way that using the wrong pot to make sweet acidic curds could ruin it all!
You’ll end up with a metallic taste in the final curd.
Either using a good stainless steel pot, ceramic or glass pot! You can also use non stick pans, but be careful that the whisk will not remove the non stick coating as you whisk it.
Note about thickening – You can use regular cornstarch for this recipe. This helps to thicken the pineapple curd without adding extra flavor.
However, I find that I prefer using Instant ClearJel because I like to freeze extra pineapple curd for any other recipes in the future.
Instant clearjel, like cornstarch will not add any flavor. It will also immediately start to thicken the pineapple curd before cooking it, but can be heated AND frozen afterwards too.
Uses for pineapple curd
There are plenty of uses for this homemade pineapple curd (aside from eating spoonfuls of it straight from the jar),
- Spread on toast or bagel
- As a filling for French crepes
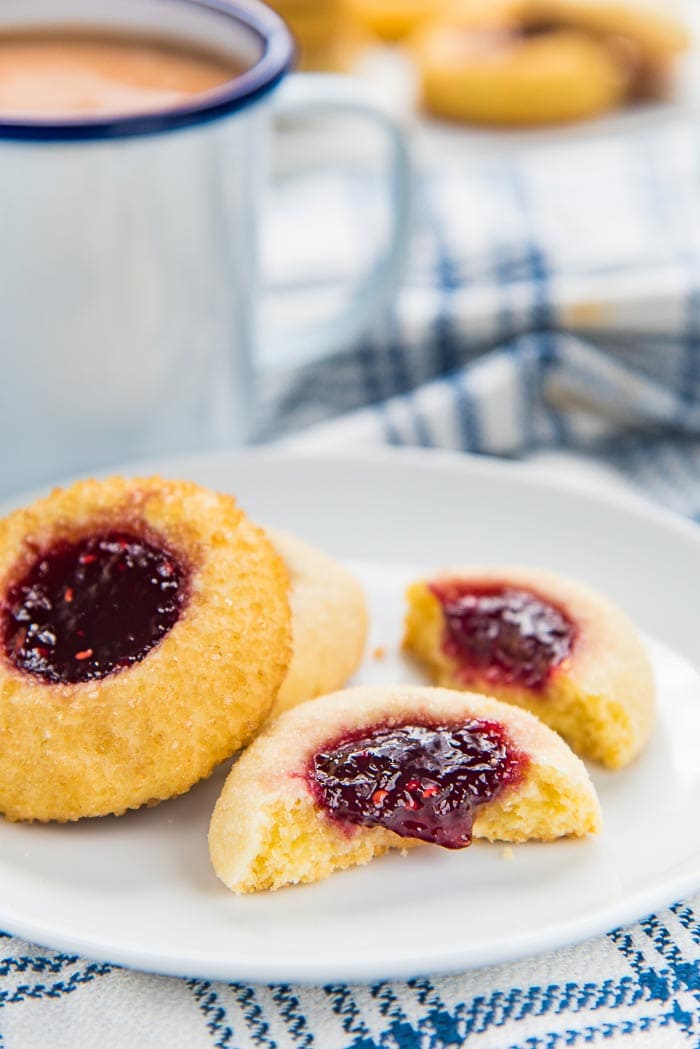
- As a filling for cookies, like thumbprint cookies
- As a filling for tarts, like this pineapple tart (piña colada tart)
- As a cake filling (like this lemon raspberry cake , but pineapple curd in place of lemon curd)
- How about pineapple cupcakes with this curd as a filling?
- In yogurt parfaits
- Topping for ice creams (like vanilla ice cream )
- Mix with cream cheese to make a cheesecake dip
- As a topping for cheesecake (like these no bake lemon cheesecake bars )
- As a cocktail mixer! Make a dessert cocktail with this pineapple curd by mixing it with coconut rum, and a little extra pineapple juice for a modified pina colada. Absolutely delightful tropical flavors!
Storage
The best way to store the curd is to store it in an airtight glass jar. It will last in the fridge for about 5 days.
If you used regular cornstarch in the recipe, then I do not recommend freezing the curd. Freezing and thawing the pineapple curd will break down the cornstarch matrix, and it will make the curd liquid-like again.
If you’re looking to freeze and thaw pineapple curd, then I recommend using instant clearjel (no cook modified corn starch). This is what I like to use.
How much curd does this recipe make?
This recipe makes about 1 ½ – 1 ⅔ cups of pineapple curd. This is about 420 – 450 g in weight.
Can I make this with fresh pineapple?
Yes, you can! But, you will need to separate the pulp from the juice. To do this, you can use a juicer to juice pineapple pieces. This will give you the juice without the pulp. The second method is to blend your fresh pineapple in your blender. Then place everything in a large nut milk bag or a fine cheesecloth and let the juice drain. Then squeeze the bag with the pulp to remove as much juice as possible.
Can I make vegan pineapple curd?
You can, but I have not tested this unfortunately. The egg yolks can be substituted with more cornstarch, but I cannot recommend how much to use in place of egg yolks.
Can I use this pineapple curd as a filling?
Absolutely! For cakes, I would still use a buttercream dam, so that the curd will be contained and cake layers are stable and will not push out the curd filling. For small bite-sized tarts, I would use this filling as is, or with just a little extra cornstarch. But if you’re using this as a filling for a larger tart, where it is crucial for the filling to not spill out when cut, then I would dissolve a little gelatin in the hot curd to give it a little more stability.
Recipe

There’s a reason why Classic Thumbprint Cookies are so popular. They are a holiday favorite, easy to make, and even easier to customize with different filling and flavor variations!
I’ve shared all my tips and tricks to help you PERFECT easy thumbprint cookies!

Oh baby, it’s cookie season! It’s one of the main reasons why I love Christmas! 🙂
And with alllll the Christmas cookies out there, it’s hard – nigh impossible, for me to pick a favorite. But Classic Thumbprint Cookies …. oh yeah, they come this close to being my favorite.
Thumbprint cookies are a holiday favorite, a party favorite, and a snack favorite for me. These are one of half a dozen or so that feature in my holiday cookie boxes every year. Shortbread cookies , linzer cookies , meringue cookies , soft ginger cookies etc. are all classics for a reason.
Plus, these cookies are really easy to make and to customize too.
I’ve shared a uniquely delicious savory thumbprint cookie on the blog before, which is really popular on the blog. But I realized I’ve never shared a classic thumbprint cookie recipe with you guys before. So today, I’m going to fix that.
This is the recipe for delightfully buttery and delicious classic thumbprint cookies with a sweet jam filling . I’m sharing all my tips to help you make PERFECT thumbprint cookies and avoid cracks and spreading.
Just follow this easy guide to find out how you can nail those classic thumbprint cookies and entertain your friends and family this holiday season!
What are thumbprint cookies?
A buttery cookie with a shallow well in the middle that’s filled with a sweet filling like jam. You use your thumb to push down on the cookie dough, creating that shallow well in the middle – hence “thumbprint” cookies.
But did you know that thumbprint cookies originated in Sweden? These cookies are called Hallongrotta/hallongrottor in Swedish, meaning “raspberry cave”!
While you can fill the thumbprint in the middle with any type of jam you like, I’ll be using raspberry jam here, because that’s the flavor of classic thumbprint cookies! But I have filled these before with strawberry jam , plum jam , fig jam , and grape jelly too.
Are thumbprint cookies the same as shortbread cookies?
They are not the same, but they do come VERY close. Shortbread cookies use a 1:2:3 ratio of sugar, butter and flour. They are buttery, but crumblier, because they don’t have a binding agent. They rely on butter to hold the dough together.
Thumbprint cookies are made with a dough that’s identical to shortbread cookies, BUT the dough has eggs in addition. Some recipes call for whole eggs, but my recipe uses egg yolks only.
The egg yolk enriches the dough giving you a richer taste than shortbread, but more importantly, binds the dough together for a smoother and more pliable result.
That being said, you still CAN make thumbprint cookies with shortbread cookie dough as well.
How can I prevent my thumbprint cookies from cracking?
To be honest, there’s nothing wrong with thumbprint cookies with a few cracks along the edges. That’s part of the charm!
However, there are ways to minimize cracking. It’s got all to do with HOW you shape the cookies .
How to minimize thumbprint cookie cracking
- Keep the dough soft – once the cookie dough is made, cover and let it rest for at least 15 minutes at room temperature, so that the dough will be easier to handle, and be less sticky. It’s important to keep the dough at room temp. when you roll it into balls, because then it’s easier to shape the soft dough, with minimal cracking.
- Make the indentation as soon as the cookies are formed – rather than rolling ALL of the cookie dough into balls first and THEN making wells, you should roll each cookie dough ball, place it on the cookie tray and immediately make the indentation BEFORE preparing the next one.
- Roll the cookie dough balls until the surface is smooth – since the dough is soft, it’s easy to get a nice, smooth surface. Make sure there are no cracks to begin with, so that they don’t widen and show up when you press down on the cookie balls to create the wells.

To elaborate on the second point above, the reason why I like to prepare each thumbprint cookie as I go is that once you have rolled the cookie into a smooth ball, the cookie will form a “crust” – much like any dough will do, if it’s left exposed to air for any amount of time. So if you wait until the end to create the wells in the middle, the crust will most definitely cause the cookies to crack. To avoid that, I do the following.
How to make thumbprint cookies
- First, portion the cookie dough with a cookie scoop.
- Roll the cookie dough into a smooth ball.
- Roll the smooth ball in sugar (optional).
- Place the cookie ball on the parchment paper-lined baking tray.
- Use my thumb or another kitchen utensil to form an indentation in the middle of the cookie.
- Repeat steps 1-5 with the rest of the cookie dough.
- Once the baking tray is filled with cookies, fill the wells with jam.
- You can either fill a second tray with more cookies and keep those in the fridge or freezer, OR wrap any remaining dough tightly with plastic wrap and keep it at room temperature until you’re ready to use.
I also like to coat these easy thumbprint cookies in sugar before placing them on the baking tray. You can use regular granulated sugar or raw sugar for this. I prefer d emerara sugar because that gives these thumbprint cookies a nice sweet crunchy texture as well.
And rather than rolling the cookie balls in sugar, I put the sugar in a small ziploc bag and then place a cookie inside the bag, and then shake it a little bit to evenly coat the cookie with sugar. Works like a charm.

How to minimize thumbprint cookie spreading
It’s pretty much impossible to make a good cookie with NO spreading at all. I mean, in theory you can add more flour to the dough until it’s pretty stiff and won’t spread at all, but then you end up with very dry, crumbly cookies.
Not good.
The simple reason why a cookie spreads as it bakes is that the butter and sugar melt inside the cookie, causing it to spread. If you bake at too low a temperature, the cookie will spread too much before it bakes and sets properly, and if you bake at too high a temp., then the cookie bakes and sets outside quickly, but the middle will still be raw.

Tips to minimize cookie spreading
- Chill the cookies in the fridge BEFORE baking – cooling the butter in the cookies before baking means that it won’t melt as readily, making it spread too fast.
- Use a chilled or room temperature baking sheet – NEVER use a hot or warm baking sheet to place your UNBAKED cookies on. I like to chill the cookies AND the baking tray together in the fridge, but at least make sure the baking tray is at room temp. before you place the unbaked cookies on it.
- Make the indentation in the middle narrow rather than wide – use just the tip of your finger and go straight down, to create a narrow indentation in the middle of the cookie, rather than a wide indentation that would make the thumbprint cookie spread.
So there you go! That’s how you can make PERFECT and EASY thumbprint cookies that are sure to impress your friends and family! 🙂
Then you can fill these classic thumbprint cookies with any type of jam you like. Personally, I love raspberry, or apricot jam.
These easy thumbprint cookies are so so good! The cookies are buttery, with a hint of vanilla, and a deliciously fruity jam filling.
And since these classic thumbprint cookies are so easy to make, you can make multiple batches and gift them to your friends and family this holiday season too. You can fill them with different jam fillings, and even flavor the thumbprint cookies with different extracts for some creative variations.

Flavor variations
- Add some orange zest to the cookie dough, and fill the middle with cranberry sauce.
- Add some lemon zest to the cookie dough, and fill the cookies with blueberry jam.
- Or instead of jam, place a reese’s peanut butter cup or a hershey’s kiss candy in the middle.
- Add some almond extract to the cookie dough, and fill the middle with salted caramel sauce .
There are so many ways you can dress up these easy thumbprint cookies! Once you realize how easy it is to make classic thumbprint cookies, you can make them your own.

Recipe
Easy Pineapple Curd (creamy, tangy, perfect results!)
Ingredients
- 480 mL 100% pineapple juice 2 cups
- 30 mL lemon juice 2 tbsp (or lime juice)
- 100 g white sugar ½ cup
- 15 g cornstarch or Instant ClearJel about 1 ½ tbsp
- 6 egg yolks from large eggs
- 85 g unsalted butter 6 tbsp (cubed)
Instructions
- Place the pineapple juice in a saucepan. Heat over medium or medium high heat and bring to a boil. Let the juice simmer for about 20 minutes or until the juice reduces in half to make 1 cup of concentrated pineapple juice. Transfer the juice into a jug to make sure that you have 1 cup. If you have less than 1 cup, then you can top it up with a little pineapple juice. Set aside. 480 mL 100% pineapple juice
- Place the sugar and cornstarch in a small dry bowl. Whisk to combine the cornstarch and sugar well. This step is especially crucial if you’re using Instant ClearJel (to prevent lumps). 100 g white sugar, 15 g cornstarch or Instant ClearJel
- In the saucepan (I use a 5 qt pot), add the sugar-cornstarch mixture, egg yolks, and lemon/lime juice, and whisk until you have a smooth mixture. Make sure there are no cornstarch or egg yolk lumps. 6 egg yolks, 30 mL lemon juice
- Pour in the concentrated pineapple juice while stirring to form a smooth mix. Add the butter. 85 g unsalted butter
- Heat the mixture over medium-high heat, while frequently whisking, until the mixture comes to a boil.
- When the mixture comes to a boil, lower the heat and continue to cook the pineapple curd while continuously whisking to prevent the egg yolks from scrambling.
- The pineapple will start to thicken more and more after it comes to a boil, and then continues to cook. Cook while whisking for a further 5 - 6 minutes (depending on the pot that you use), until the pineapple curd registers between 180 - 190°F / 82 - 88°C.
- The pineapple curd might start to look a little translucent, and this is OK, as long as the eggs are not scrambling.
- Optional but recommended - Remove the pot from the heat and use a stick blender to blend the pineapple curd. Alternatively, you can place the curd in a blender or food processor and blend for about 1 - 2 minutes. This will make the curd creamy.
- Pass the pineapple curd through a sieve into a bowl to remove any lumps.
- Cover the bowl with plastic wrap. Make sure the wrap is touching the whole surface of the curd to prevent a skin from forming on top. To speed up the chilling time, you can spread the curd in a large, shallow pan instead.
- Alternatively, transfer the mixture into a glass storage jar with a tight-fitting lid.
- Let the curd cool down a little before transferring it to the fridge and then let it completely chill (preferably overnight).
- Serve the curd chilled.
Notes
Storage
Adjustments to make the pineapple curd thicker for fillings
Recipe changes
Nutrition
Recipe from The Flavor Bender by Dini Kodippili
Easy Pineapple Curd (creamy, tangy, perfect results!) https://www.theflavorbender.com/the-best-pineapple-curd-recipe/
